كيفية تمكين وضع خلفية سوداء في Excel
كيفية تمكين وضع خلفية سوداء في Excel - Download Full ⚡️
Fortunately, most software designers have recognised this aspect and started including a dark theme as part of their default themes.
Microsoft Excel also has a built-in dark theme that you can try. But, it has one major problem. The cells are still coloured white, even if the dark mode is enabled.
But, there is still a way to enable true dark mode in Excel. In this tutorial, I’ll take you through the steps to make it happen.
Note: You can download a sample dark mode enabled Excel file, along with some ready-made dark background images by clicking here.

Watch this short video tutorial on how to enable the dark mode in Excel
Step 1: Enable Excel Dark Mode via Office Theme
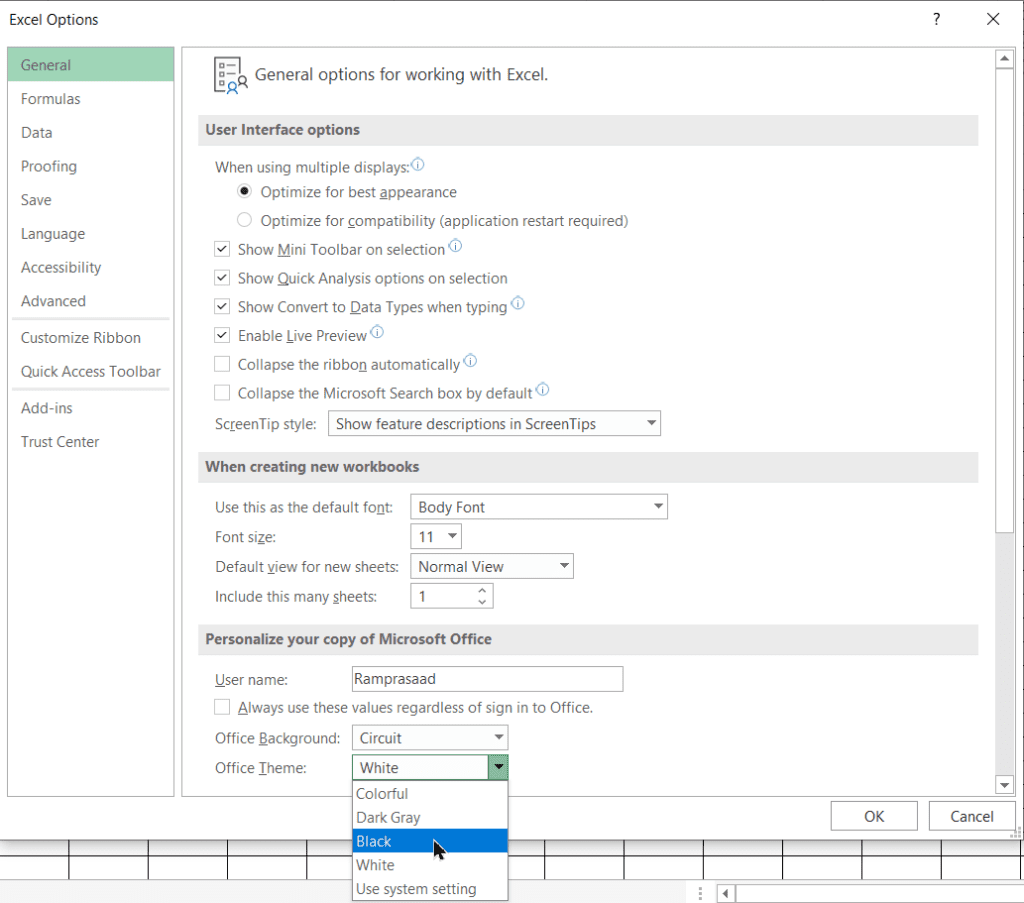
As the first step, you have to enable the in-built dark mode by changing the default office theme.
To do this, just go to Files>Options>Office Theme and change it to Black or Dark Grey as per your requirements. You can also apply the system theme if you want.

Once you do this, you’ll see that the dark theme is applied to everything inside the Excel window except the cells. At least, it’s better than nothing.

Step 2: Create a Sheet Background in Powerpoint
All we have to do now is create a suitable dark background for the Excel sheet. You are free to do this however you like. For example, you can do this by having a blank dark background taken from the internet or simply creating one with Photoshop.
But, for the best results, I always recommend using Powerpoint for this.
Open a blank presentation in Powerpoint, and go to Design>Format Background. Apply a suitable dark colour to your blank slide.
Now, I recommend you make similar slides with slightly different dark colour shades on each slide. You can totally skip this if you are sure about the exact colour you want to use

Finally, save them as PNG images in an easy to locate folder location.

Step 3: Add Background in Excel Sheet
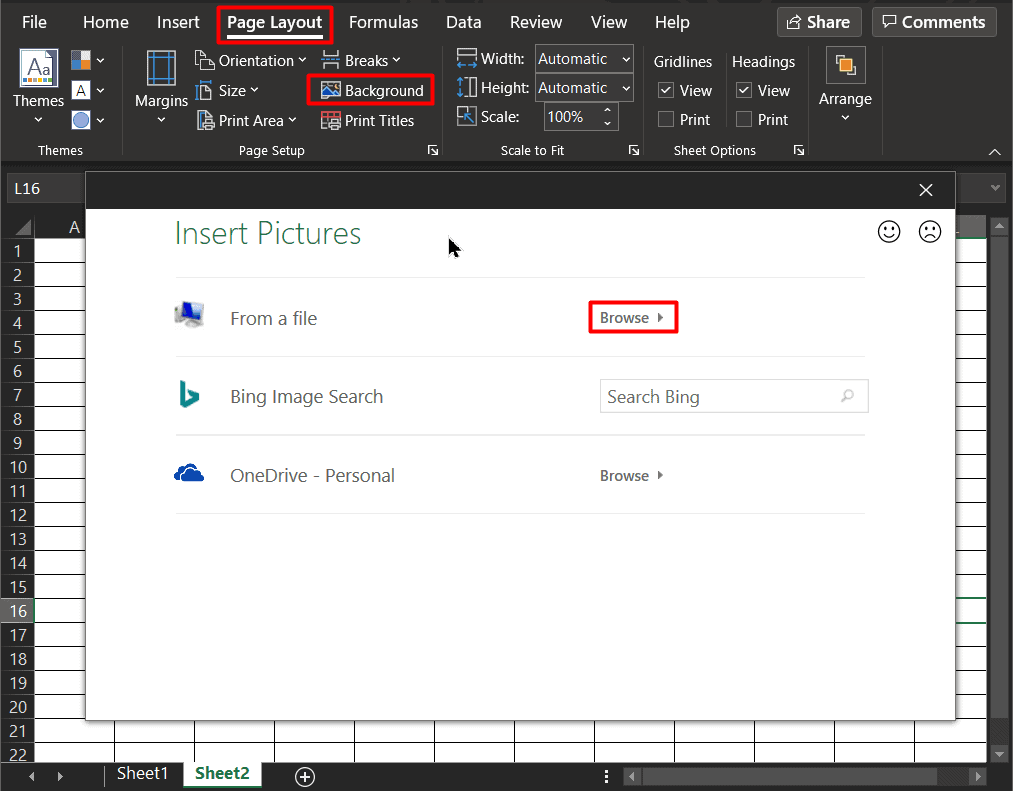
Now that you have the background image ready, all you need to do now is go to Page Layout>Background in Excel and select the appropriate PNG images that you created.

You can use trial and error and change the background to find out which shade of black suits you best.
But, keep in mind that you have to change the font colour to white or any other contrasting colour for the entire sheet.

Note: This added dark background only applies to that specific sheet you are working on. You have to add them separately to all sheets if needed.
You might also like: Coolutils PDF Splitter 5.2.0.100
